

A dip into ink
My experiments from a botanical ink art class (3 minute read)

This weekend, I’ve been attending a couple of nature-related art classes with Sandra Morris, so today I’m simply sharing some of what I learned about drawing with plant inks. I know this is a little off topic, but I’ll return to nature next Sunday with a close-up look at a couple of weird life forms.
I usually draw with fibre- or felt-tipped pens, so using a dip pen and ink was an interesting challenge. A dip pen is simply a metal nib attached to a stylus, which is dipped in ink and then used for writing or drawing. It doesn’t have a cartridge for ink as a fountain pen does, but simply uses the ink which is held on the nib’s surface. It’s less annoying than it sounds, because I found I could do quite a bit with a single dip. When I look at what I drew, I can see that it has a certain life to it that I don’t get from a felt pen.


However, dip pens do have a certain flaw, from my perspective — they are almost impossible for a left-hander to write with. The shape of a dip pen means that they work only in one direction. If you hold a dip pen in your right hand, you can make strokes from left to right and top to bottom, and anything between these. If you try to push the pen upwards or to the left, though, it will catch on the paper. A left-hander can make strokes from right to left and top to bottom, but not left to right. For drawing, this is fine. But unless you are writing in Hebrew or Arabic, it’s a serious problem. You might notice that where I’ve labelled my drawings that my writing is a little wonky. That’s why.
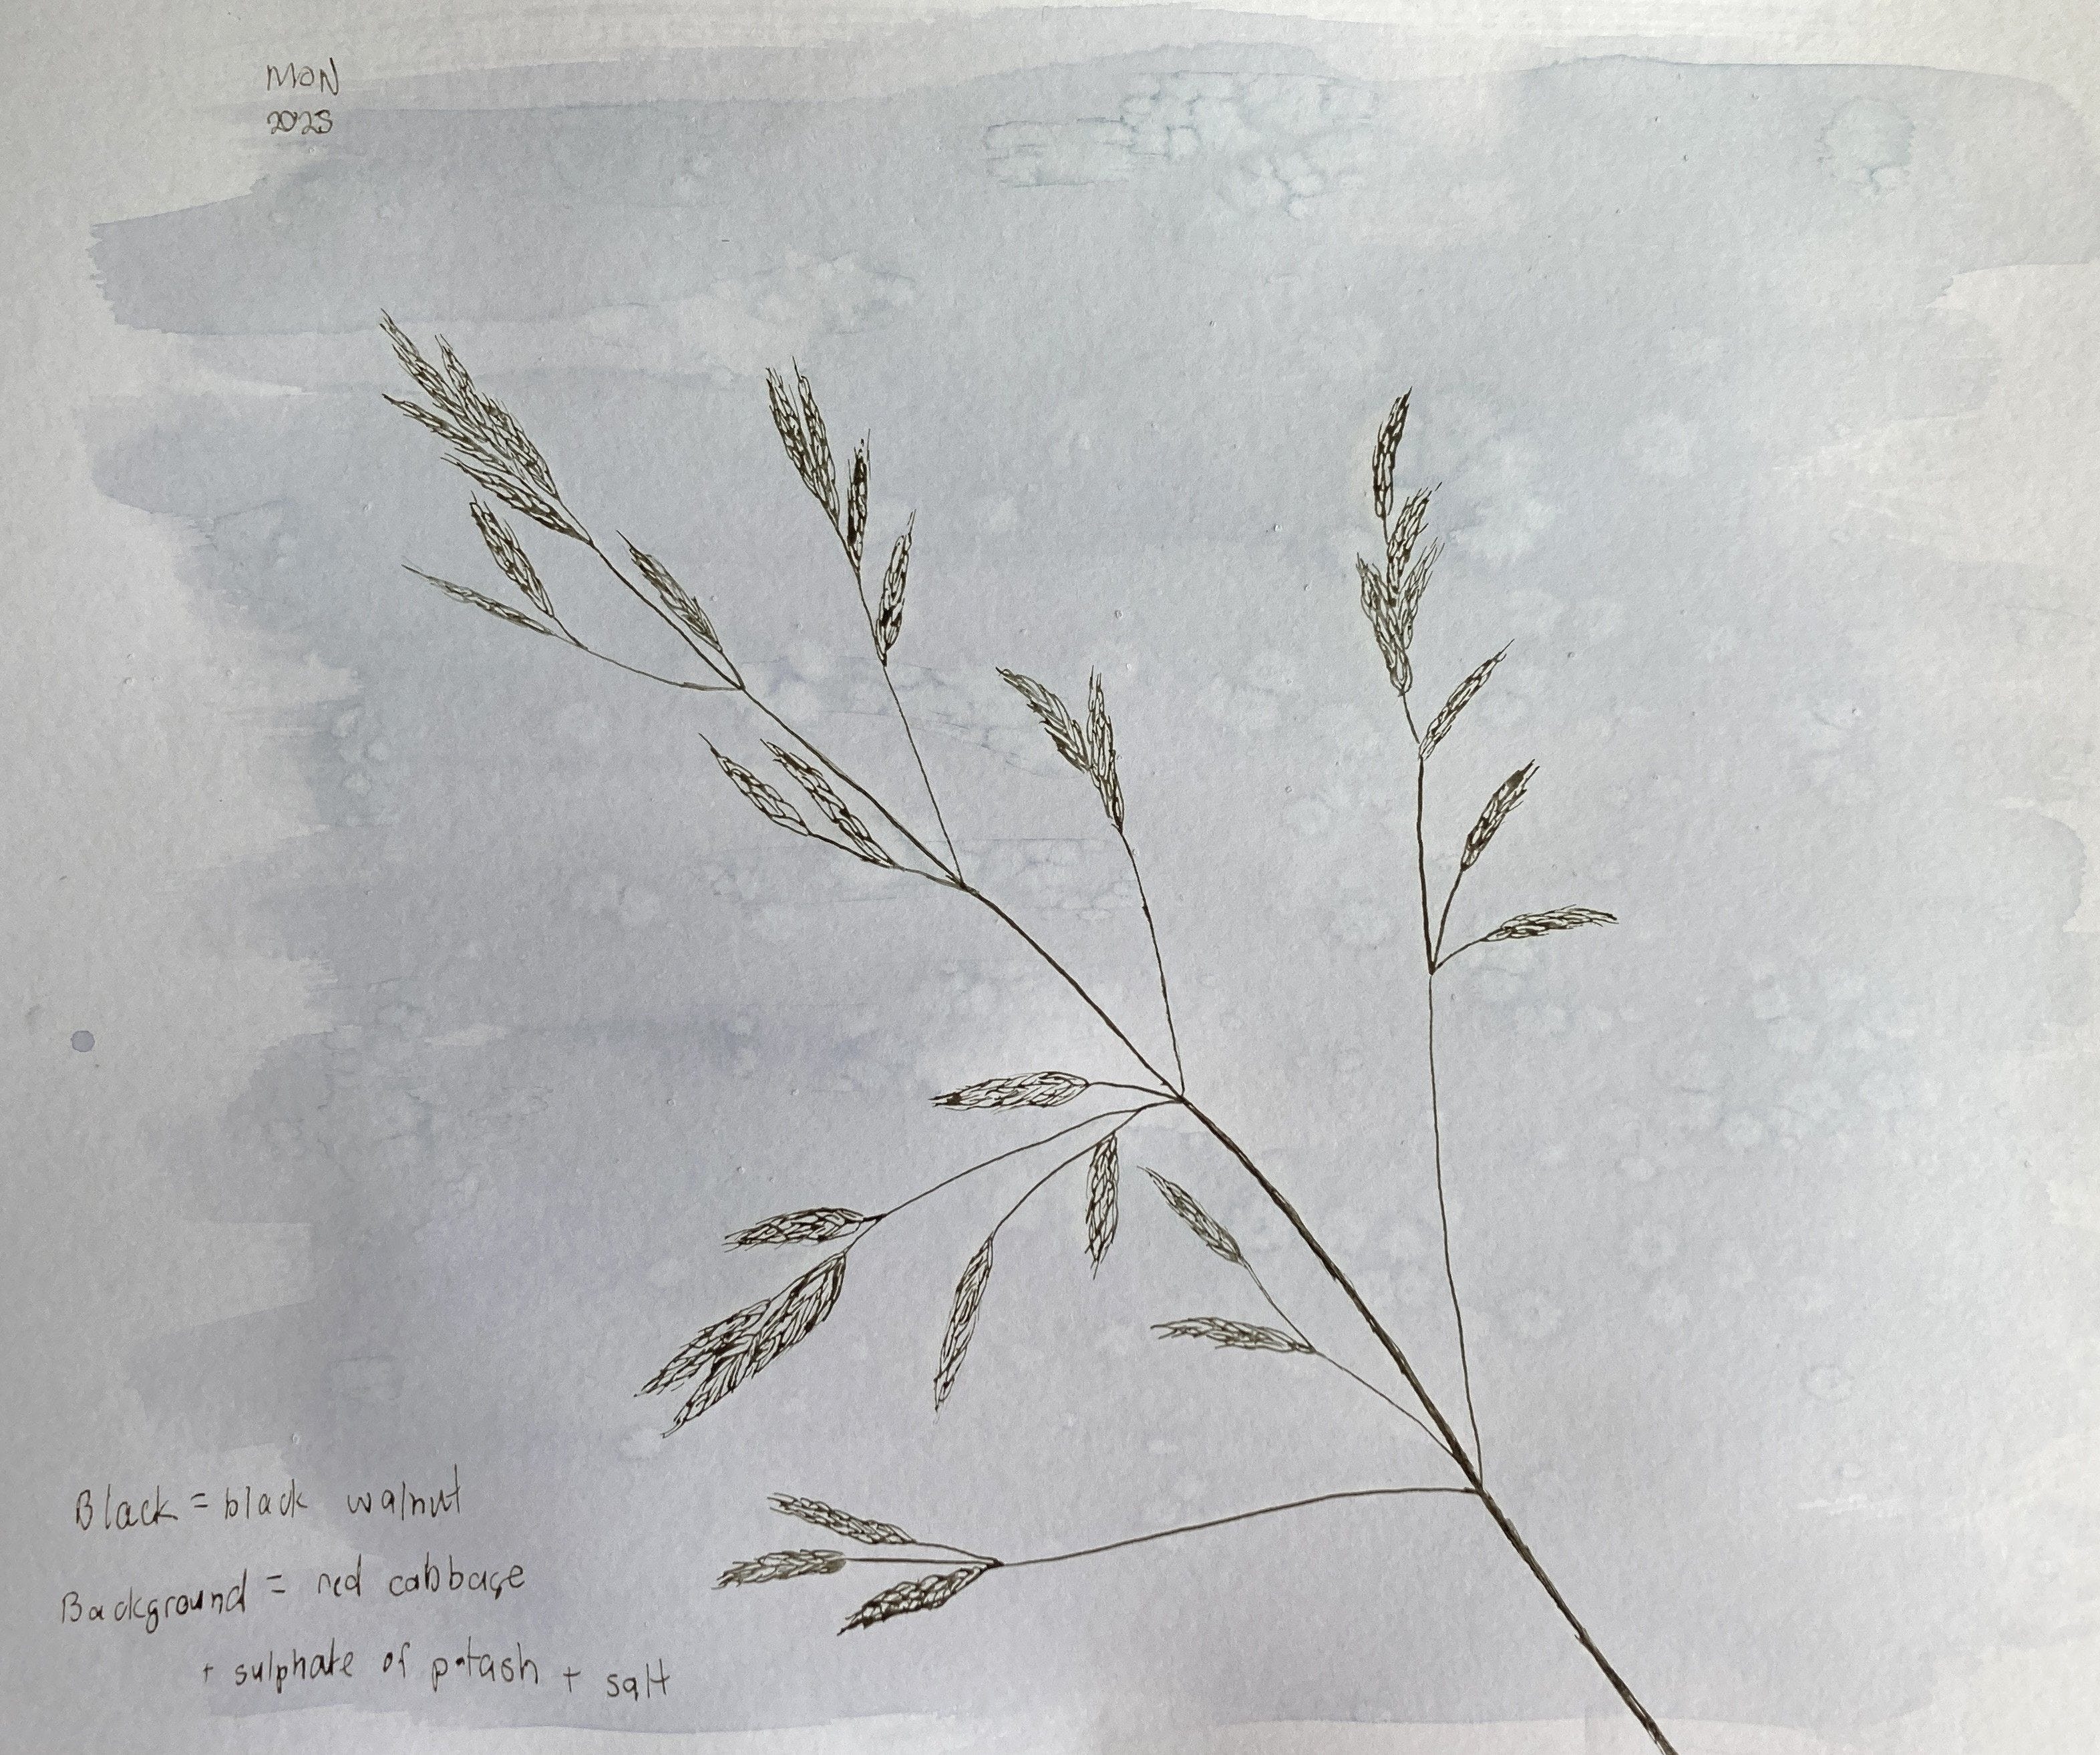
The inks I was using were created mainly from plants. We didn’t make them in the class, but Sandra brought them along for us to try. The black ink was made from boiling the husks of black walnut (not the shells but the green part which is around the shell). From what I’ve read online it’s possible to use ordinary walnuts, but black walnut is better. If you happen to have a black walnut tree near you, let me know. There are none close to me, according to iNaturalist.
Here is the first step in my black walnut ink drawing of prairie grass.

The most interesting inks, for me anyway, were those made by soaking the outer leaves of red cabbage in water. Adding compounds such as baking soda or alum to the resulting liquid changes the acidity, and therefore the colour. The colour also changes as the ink dries. In the image below, I’m putting a wash over my line drawing of prairie grass. You might be able to see that the upper part of the image is bluer and the lower pinkish. The pinkish ink is wet, while the blue is drying.

We also experimented with putting salt on the damp paper, which caused patterns in the ink. Here’s an example with salt on wet ink, then the dried image with salt removed.


I tried out all the different inks on the page below. In case my writing is hard to read, the inks are:
Red cabbage and sulphate of potash
Acorn caps
Red cabbage and washing soda
Red cabbage and baking soda (two different batches)
Red cabbage and aum
Saffron thread
Copper in vinegar
Cabbage inks aren’t light-fast, so the images will lose some of their colour over the coming days and weeks. I’m simply going to enjoy their ephemeral beauty.

Finally, here is the completed drawing of prairie grass in the rain (represented by salt spots).
I shall search for a caligraphy nib for left handers now! Your drawing is beautiful.
Wonderful drawings! What is aum? My current search engine isn’t giving me much to go on (other than the new years fest up north!) oh, alum haha relooked and the drawing has the l